


04 July 2023. By Olivia Davis. Estimated time required for a perusal: 6 minutes.

Understanding the Basics of Image Conversion in Autocad 🎨🖌️
When it comes to converting images to AutoCAD lines, the first step is to understand the basics of image conversion. Before you begin, make sure you have the right file format. AutoCAD supports a variety of file formats including BMP, PNG, JPEG, and GIF.
Next, it’s important to know that the quality of your image will impact the conversion process. Ideally, you want to work with high-resolution images to ensure that the lines are clean and sharp. If you’re starting with a low-quality image, you may need to touch it up in a photo editing software to improve the quality before importing it into AutoCAD.
If you’re new to image conversion, it may be helpful to check out a step-by-step guide to converting images for laser cutting here, which covers some basic image conversion concepts that can be applied to AutoCAD as well.
Best Practices for Preparing Your Image Prior to Conversion 📷🛠️
Before converting an image to AutoCAD lines, there are some best practices to keep in mind to ensure a smooth conversion process. First, make sure your image is properly scaled. If the scale is off, it can lead to inaccuracies in the final line drawing.
In addition to scaling, it’s important to have a clear understanding of the objects you want to convert. In some cases, it can be helpful to crop the image to focus on the specific area you want to trace with AutoCAD lines. This can help reduce the risk of overcomplication during the conversion process.
Finally, removing any unnecessary backgrounds, such as a white background for a logo, can give you a better result during the image conversion process. By following these best practices, you’ll have a solid foundation to work from during the image conversion process and reduce the risk of needing to make significant changes to the drawing once it’s imported into AutoCAD.

Step-by-step Instructions for Converting an Image to Autocad Lines 🖥️➡️📐
Converting images to AutoCAD lines may seem daunting, but it’s a simple process once you know what to do. The first step is to open your AutoCAD software and import the image you want to convert. There are two ways to import an image: you can either drag and drop the file directly into the AutoCAD workspace or use the INSERT command to browse for the file.
Once you’ve imported the image, you’ll need to trace over it using the LINE command. Start by selecting the LINE command and clicking on the first point of your image. Then, carefully trace over the image using your cursor. Be sure to use the SNAPPING function to help you stay on track. Repeat this process until you’ve traced over the entire image, and don’t forget to save your work!
For more detailed instructions on how to convert an image to AutoCAD lines, check out this step-by-step guide which includes helpful screenshots to guide you through the process.
Tips for Troubleshooting Common Conversion Errors 👀💻⚠️
Despite your best efforts, it’s possible you’ll run into some issues during the image conversion process. One common issue is excessive fuzziness in the final result. This can happen if your original image was low resolution or had compression artifacts. To help mitigate this issue, try using a higher resolution image and avoid compressing it before importing it into AutoCAD. Additionally, you can try adjusting the image’s brightness and contrast settings to help sharpen the final result.
Another issue you might encounter is missing lines or gaps in the final result. This can happen if you accidentally skip over a portion of the image when tracing, or if you don’t properly connect individual lines. To avoid this issue, make sure you’re using the SNAPPING function to guide your cursor as you trace, and double-check that you’ve properly connected lines once you’ve finished tracing over the entire image.
If you’re running into other issues during the conversion process, such as incorrect line placement or inaccurate scaling, be sure to consult the step-by-step guide mentioned earlier or consult with your peers for additional assistance.
Advanced Techniques for Optimizing Line Quality and Accuracy 📏📐
Now that you understand the basics of image conversion in AutoCAD, it’s time to explore some advanced techniques for optimizing line quality and accuracy. One of the most important things you can do to ensure the best possible conversion is to properly prepare your image. As we mentioned earlier, having a high-resolution image can make a big difference in the final result. Another technique you may find useful is applying various filters to the image, such as edge detection or sharpening. These filters can help improve the sharpness and clarity of the lines in your final conversion.
Another important factor to consider is the type of object you are trying to convert. Some objects, like text or logos, can require different techniques to achieve the best results. It’s important to experiment with different techniques until you find the best one for your specific needs. You may also want to consider using specialized tools, like Scan2CAD, to achieve even better accuracy in your line conversions. To learn more about how to convert images to DXF using Scan2CAD, check out this comprehensive guide here.
Practical Applications for Autocad Line Conversions in Various Industries 💻🏭
AutoCAD line conversions have practical applications in a variety of industries, from manufacturing and engineering to architecture and design. By converting images to AutoCAD lines, you can create detailed schematics and blueprints that are essential for these industries. In manufacturing and engineering, AutoCAD line conversions are often used to create 2D or 3D models of complex objects or machines, which can be used for prototyping and testing purposes.
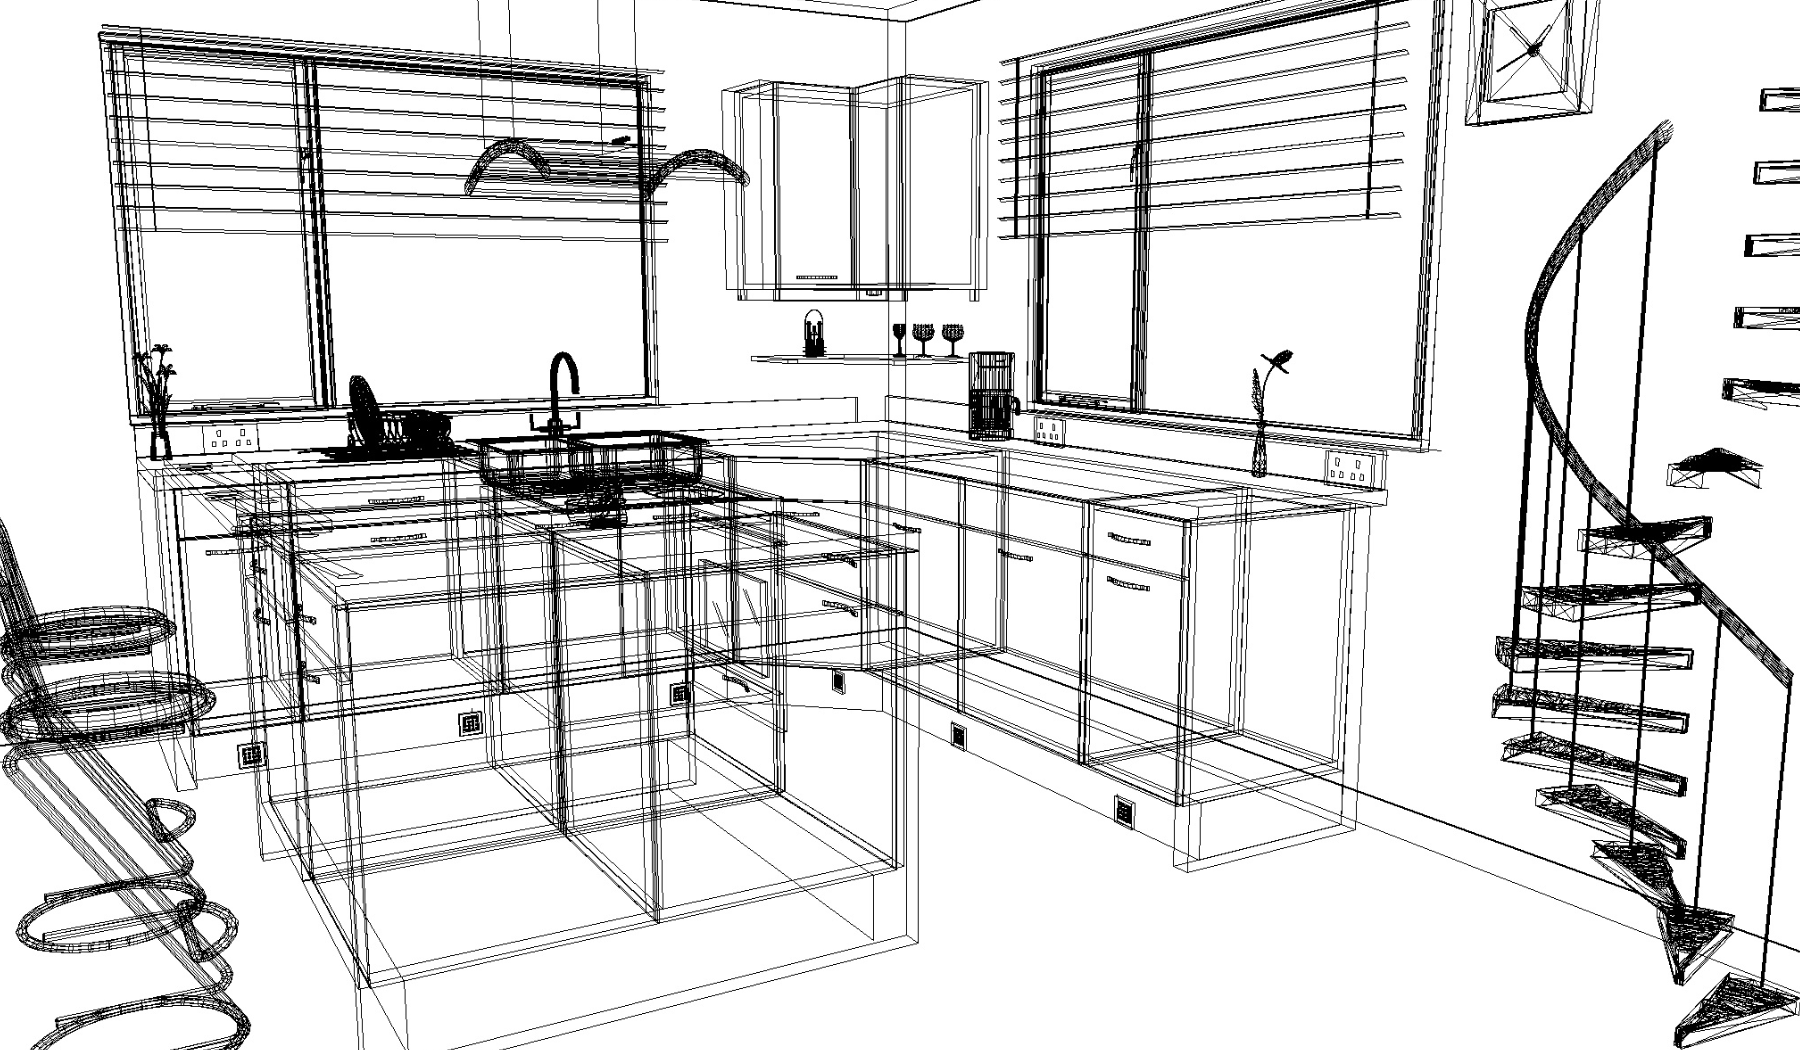
In the world of architecture and interior design, AutoCAD line conversions are essential for creating detailed floor plans and elevations. By converting images to AutoCAD lines, you can quickly create accurate and detailed drawings that can be used to guide the construction process. And in the field of graphic design, AutoCAD line conversions can be used to transform sketches or hand-drawn illustrations into digital designs that can be manipulated and edited more easily.


This product provides valuable insights and techniques for optimizing line quality and accuracy in AutoCAD. The emphasis on image preparation and high-resolution images is commendable. The use of filters like edge detection and sharpening enhances the overall sharpness and clarity of lines. The recognition of different techniques for various objects adds to the product’s appeal. Overall, a comprehensive and effective resource.
The use of filters in this application is crucial as it enhances the sharpness and clarity of converted lines. It’s important to consider the object type being converted, as different techniques may be required for optimal results. Specialized tools like Scan2CAD can further improve accuracy. Autocad line conversions find practical applications in diverse industries such as manufacturing, engineering, architecture, and design.