


15 July 2023. Written by Samuel Wright. Estimated perusal time: 5 minutes.
Understand the Image Formats Compatible with Archicad
Archicad is compatible with various image formats, including BMP, GIF, JPEG, PNG, and TIFF. Each of these formats has its own benefits and limitations. BMP is a widely-used format that provides high-quality image files. GIF, on the other hand, supports transparency and is ideal for web graphics. JPEG is suitable for compressing photographic images and is often used for web-based graphics. PNG is a popular format for high-quality graphics, as it supports transparency and offers smaller file sizes. Meanwhile, TIFF supports high-resolution images and is used in printing and publishing.
It is important to note that while Archicad is capable of working with various image formats, it is always advisable to use images that are appropriate for the specific purpose of the project. If you are not sure which image format to use or if you have images in a different format that you’d like to use in Archicad, you can always check Archicad’s documentation or seek assistance from experienced users. Also, if you are looking for ways to create or edit custom hatch patterns in AutoCAD, check out this step-by-step guide.
Use the ‘Place External Drawing’ Tool to Import Images
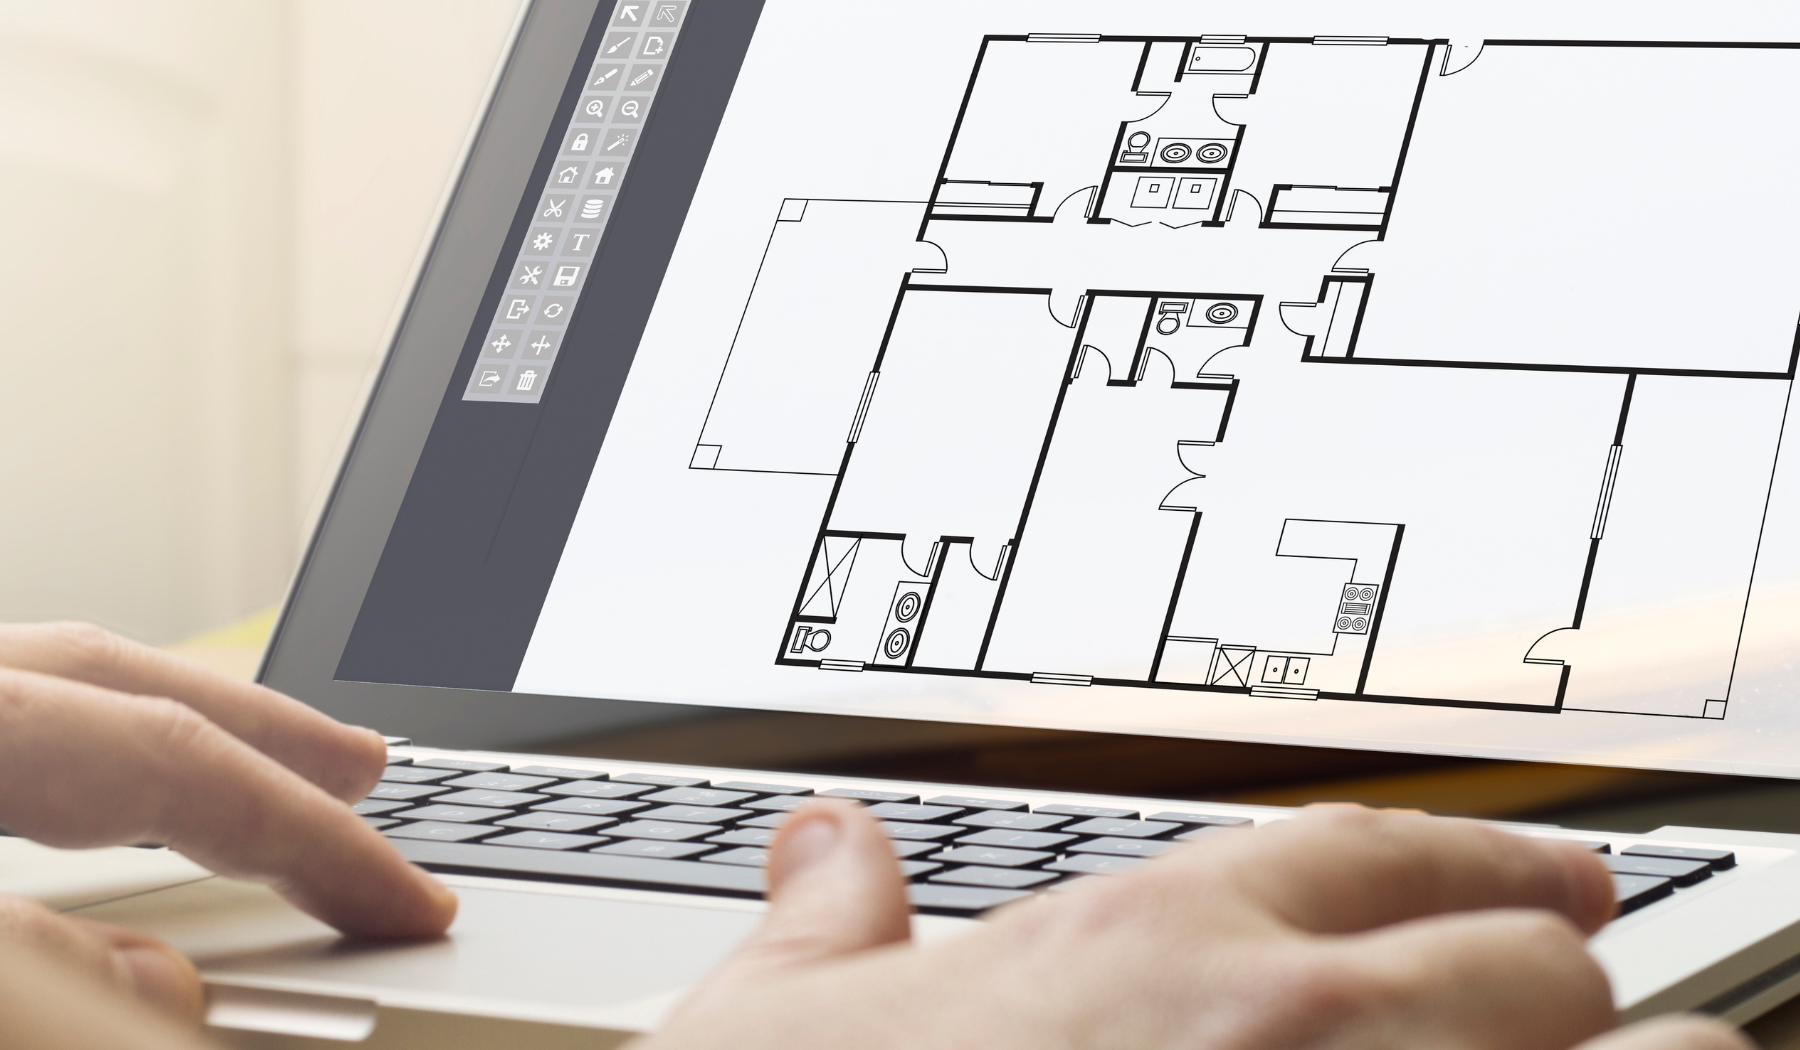
The ‘Place External Drawing’ tool is an effective way to import images into Archicad. To use this tool, click on the ‘External Content’ tab from the Archicad Toolbox, select the ‘Place External Drawing’ tool, and then choose the file format of the image you would like to import. Once you have selected the file, simply click on the location where you want the image to be placed. You can also use the ‘Options’ tab to customize the settings of the imported image, such as adjusting the scale, rotation, and layer.
It is also possible to import multiple images at once by selecting them from a file directory or simply dragging and dropping them into the Archicad window. This is especially useful when importing images for a large project that requires multiple drawings. If you have any difficulties importing images into Archicad, you can always refer to the software’s documentation or seek assistance from online forums or experienced users.
Customize Image Settings to Optimize Your Import
After importing your image into Archicad, it’s important to customize the settings to get the best possible results. One important setting to consider is the resolution of the image. Higher resolution images will appear more detailed and realistic, but may also slow down the performance of your project. To optimize performance, it’s recommended to resize images to match the scale of your project. It’s also important to consider the color settings of your image. In Archicad, you can adjust the gamma, brightness, contrast, and saturation settings to enhance the visual quality of your image. By customizing these settings, you can achieve a more realistic and vivid representation of your project.
If you want to take your visualization skills to the next level, you can also add textures and materials to your images. Archicad has a vast library of materials and objects that can be used to create a realistic representation of your project. By adding textures to your walls, ceilings, and floors, you can create a more immersive experience for your clients or stakeholders. To learn more about how to add custom hatches and patterns in AutoCAD, check out this step-by-step guide.
Add Depth and Realism to Your Images with Shadow Settings
Adding shadows to your images is a great way to create a more realistic and immersive representation of your project. In Archicad, you can use the shadow settings to adjust the depth, direction, and intensity of the shadows cast in your project. By customizing these settings, you can create shadows that match the time of day or lighting conditions of your site.
Archicad also allows you to adjust the opacity and blur of your shadows to create a softer and more natural effect. When using the shadow settings, it’s important to consider the materials and textures used in your project, as they can affect the appearance of the shadows. By experimenting with different shadow settings and materials, you can create a more compelling and lifelike representation of your project. If you are looking for ways to create and edit revision clouds in AutoCAD, check out this step-by-step guide.
Enhance Your Images with Editing Tools and Techniques
Before importing an image into Archicad, it’s important to make sure that the image is edited and enhanced to meet the required specifications. Photo editing software like Adobe Photoshop or GIMP can help you adjust the brightness, contrast, and color saturation of the image. You can also crop or resize the image to fit the desired dimensions.
Another useful technique is to add textures and shading to your images. This can give your design a more realistic and 3D look. You can create your own textures using image software or use pre-made ones from online libraries. Applying shading can also help to define the shapes and contours of your design. If you want to learn more about creating 3D designs in AutoCAD, this step-by-step guide can help.
Tips and Tricks for Efficient Image Import and Management in Archicad
When importing images, it’s important to keep them organized and properly named. This will make it easier to find and manage the images, especially if you are working on a large project that requires multiple drawings. Create a folder for your images and give each image a descriptive name that reflects its content.
Another tip is to use the ‘Match Lines’ feature to ensure that imported images are accurately scaled and positioned. This feature allows you to match up lines and points in the imported image with lines and points in the Archicad model. This will help to reduce errors and improve accuracy.
By following these tips and tricks, you can enhance the efficiency and productivity of your image management and import process in Archicad. And remember, if you ever face any difficulties or issues, don’t hesitate to seek assistance from the Archicad documentation, forums, or experienced users.


How can implementing efficient image import and management practices in Archicad contribute to overall project success and client satisfaction?
Implementing efficient image import and management practices in Archicad can greatly enhance overall project success and client satisfaction. However, if these practices are not properly implemented, it can lead to unnecessary complications and frustration.
One of the main benefits of efficient image import and management is that it allows for smooth collaboration among team members. When images are organized and easily accessible, it becomes easier to share and discuss design ideas. On the other hand, a lack of efficient practices can result in confusion and delays, leading to client dissatisfaction.
Additionally, effective image management ensures that all project stakeholders have access to the most up-to-date visuals. This is crucial for client satisfaction as it enables them to have a clear understanding of the design progress and make timely decisions. However, if images are not properly imported and managed, outdated visuals may be shared, leading to misunderstandings and frustration.
Furthermore, efficient image import and management can significantly improve project efficiency. When images are organized in a logical manner, it becomes quicker and easier to find specific visuals when needed. This saves valuable time for both the architectural team and the client. Conversely, if images are haphazardly imported and managed, precious time may be wasted searching for the correct visuals, negatively impacting project success and client satisfaction.
In conclusion, implementing efficient image import and management practices in Archicad is crucial for overall project success and client satisfaction. However, if these practices are not properly executed, it can lead to confusion, delays, and frustration for all parties involved. It is therefore essential to prioritize and implement these practices effectively to ensure a smooth and satisfying architectural experience.